User Defined Functions (UDFs) allow you to easily build logic to process columns in Spark but often can be inefficient, especially when written in Python. Scala UDFs are significantly faster than Python UDFs. As in orders of magnitude faster. Recently worked with someone that needed a UDF to process a few hundred GB of data. When switching from a Python UDF to prebuilt Scala UDF processing time went from 8 hours and giving up to around 15 minutes. Finding how to do this though was a challenge, so I want to document the process for others.
Setting up the Environment
You have to set up a local programming environment to create the Scala library that contains your UDF. I followed the guide from the Microsoft document "Tutorial: Create an Apache Spark application with IntelliJ using a Synapse workspace". IntelliJ works pretty well and has a direct integration with the same library versions of Spark as Synapse Spark which makes the dev process much easier!
Creating the UDF
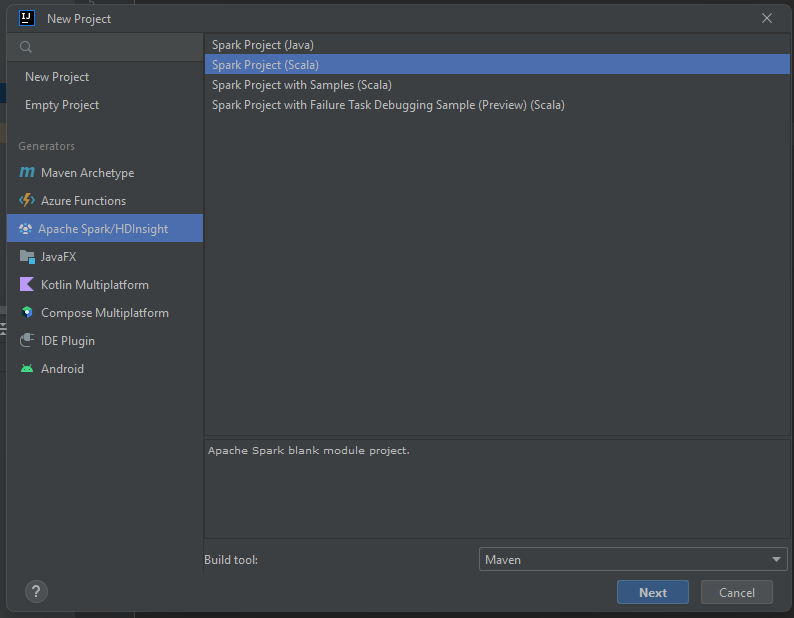
Start a new project in IntelliJ and choose an "Azure Spark/HDInsight" generator and a Spark Project (Scala) template.
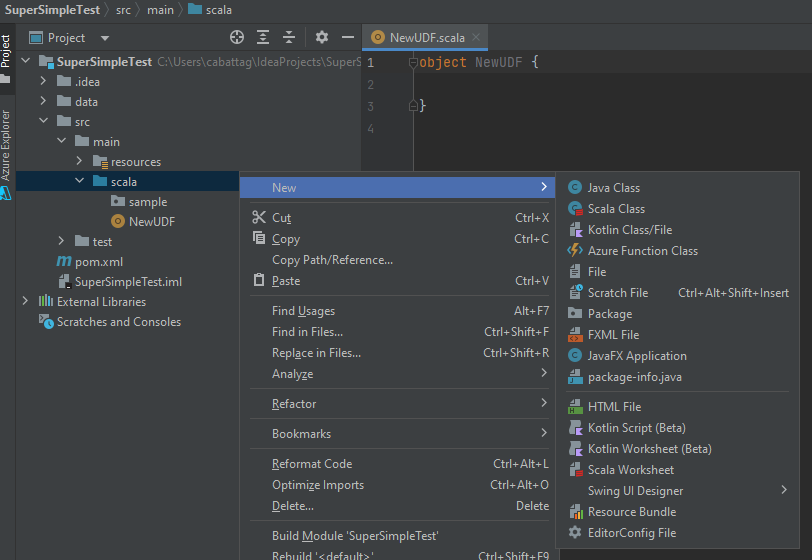
Once the project is created you should have a folder framework for your project. Expand src -> main. Then right click on scala and select New -> Package.
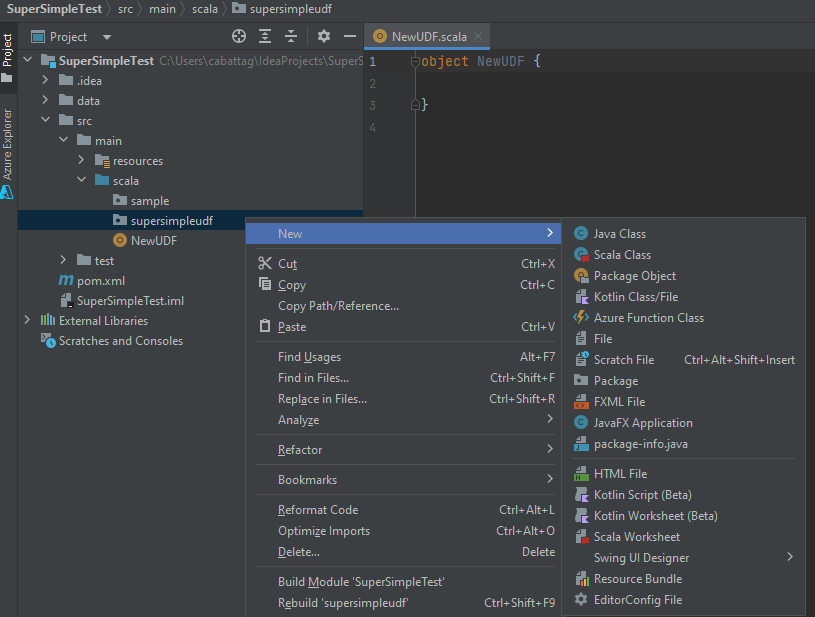
After filing in a name and clicking Ok you will get a new folder, right click on the folder you created and select New -> Scala Class.
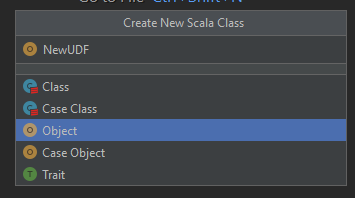
On that pop up, select Object and give the Object a name.
You will get a basic object scaffold for your Scala class. Below I have a testing UDF I created; the comments explain each part you would need to create the initial UDF.
package supersimpleudf

// Import the Spark packages needed to communicate with the session
import org.apache.spark.sql.SparkSession
import org.apache.spark.sql.functions.udf
import org.apache.spark.sql.expressions.UserDefinedFunction

object NewUDF {
  // Our actual function that does the work
  def addOne(a: Int): Int = {
    a + 1
  }

  // defining our function as a UDF
  def addOneUDF: UserDefinedFunction = udf(addOne _)

  // Register our function as a UDF
  def registerUdf: UserDefinedFunction = {
    // This connects to our spark session so we can interact
    val spark = SparkSession.builder().getOrCreate()
    // This
    spark.udf.register("addOne", (a: Int) => addOne(a))
  }
}
Once you have your code laid out you will need to export the UDF as an artifact. This will create a .jar file that we can add to our Synapse Spark pool.
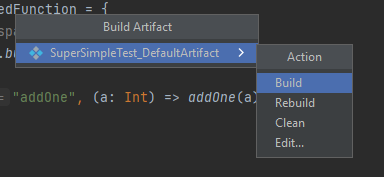
To create the artifact, click on the Build menu, Build Artifacts... You will get a popup asking if you want to build, rebuild, or edit. Click build to create the artifact. If you want to change settings, you can use edit (it's also the easiest way to find where it will copy the artifact to).
Adding the UDF to Synapse
Now that we have created and packaged our UDF, let's get it added to the Synapse Spark pool so we can actually use it. I will assume you have a Synapse Workspace with a Spark pool before starting.
Go to Manage -> Workspace Packages -> Upload -> Select the artifact we created before and then click Upload. Once that is completed, we now have the ability to use that package in Spark pools in the workspace, but to do so we have to add the package to the pool.
Go to Apache Spark pools (still in the Manage section of Synapse) -> click the three dots by the pool you want to use -> Click Packages -> Select from workspace packages.
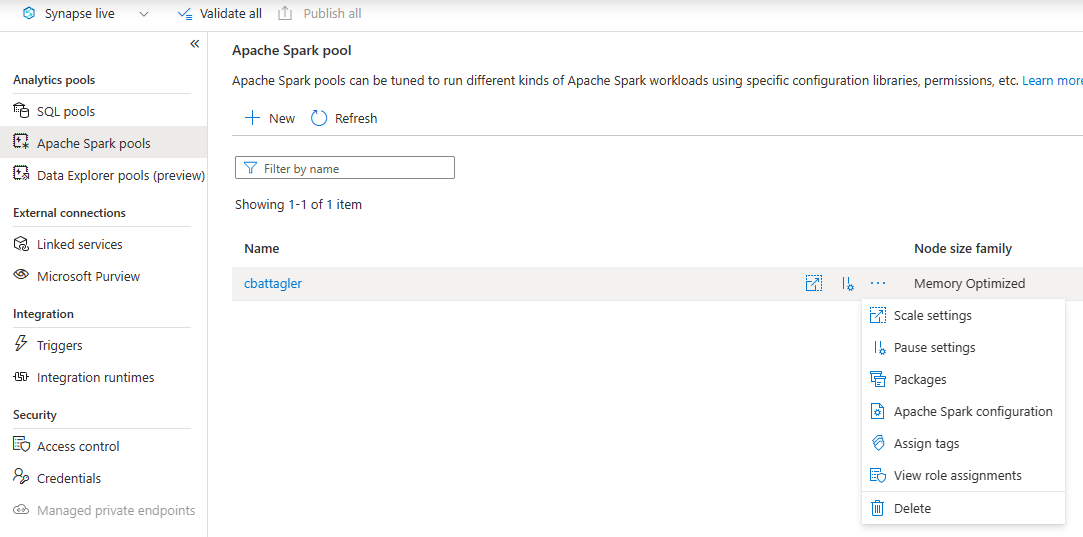
Click the checkmark by the newly added package and click select and then Apply. This will take a few moments to process, but now we can finally use the scala UDF as part of a notebook!
Using the UDF within a Notebook
You've stuck it out this far! You are ready to finally call the UDF from a Synapse notebook! If you just want the end result, here's a gist of the notebook.
Using the Scala UDF in Spark SQL is quite simple now that we have the package added. You can just run the registerUdf() method we created in Scala and now the UDF is available!
# This runs our initial registration process to add the UDF to Spark
from pyspark import SparkConf, SparkContext

# Note the namespaces here are dependent on what you created in IntelliJ
# The first item after _jvm is the "package" line from your scala code
# The second item after that is the Object name from your scala code
spark._jvm.supersimpleudf.NewUDF.registerUdf()

# Once added we are able to directly use the UDF in Spark SQL

from pyspark.sql import Row

# This creates a testing DataFrame
olddf = spark.createDataFrame([
    Row(a=1, b=4),
    Row(a=2, b=4),
    Row(a=3, b=4),
    Row(a=4, b=4),
    Row(a=5, b=4),
    Row(a=6, b=4),
    Row(a=7, b=4),
])

# Adds it as a temp view into Spark SQL
olddf.createOrReplaceTempView("olddf")

# And runs our UDF "addOne" assigning the results to a new Data Frame
df = spark.sql("SELECT addOne(a) FROM olddf")
df.show()
As you can see, once you've ran the registerUdf() method you can directly call it in Spark SQL, but that isn't our end goal, we want PySpark!
That takes a few extra steps, we will have to build a wrapper function that directly converts our data to something the JVM can understand.
# Using this directly from PySpark becomes more complex
from pyspark.sql.column import Column, _to_java_column, _to_seq

# Create a testing data frame again
newdf = spark.createDataFrame([
    Row(a=1, b=4),
    Row(a=2, b=4),
    Row(a=3, b=4),
    Row(a=4, b=4),
    Row(a=5, b=4),
    Row(a=6, b=4),
    Row(a=7, b=4),
])

# Create a function to directly interface with the UDF
def add_one_udf(a):
    # Assign our UDF to a variable we can call (see above for dot naming conventions)
    addOneUDF = spark._jvm.supersimpleudf.NewUDF.registerUdf()
    # Return our data as a column from the UDF. The apply method runs the UDF.
    # The _to_seq function converts our data to a JVM sequence (what the UDF needs)
    # [a] is the column data we sent, and _to_java_column is the convertor used.
    return Column(addOneUDF.apply(_to_seq(spark, [a], _to_java_column)))

# Finally we run our UDF against our data frame and create a new output
df = newdf.select(add_one_udf("a").alias("aplus"))

df.show()
Once you have the wrapper function in place though you will notice we can easily call our UDF just like any other PySpark method. The difference of course is it's fully custom code and is blazing fast compared to a Python UDF!